How to Stain and Seal a Redwood Deck So It Lasts Forever
Whether your forest deck is brand new or it's set for a maintenance staining and sealing, you will want to take the time to stain and seal it properly.

This not only makes the deck more beautiful (an important outcome, since it's a definite value to your dwelling), but it volition make the deck last longer and wear ameliorate.
In curt, doing a good job in staining and sealing a redwood deck is an asset to your yard and to the quality of your life. Simply make sure to use the right deck stain and sealer, and have some patience. Here, I'll prove y'all how!
 View in gallery
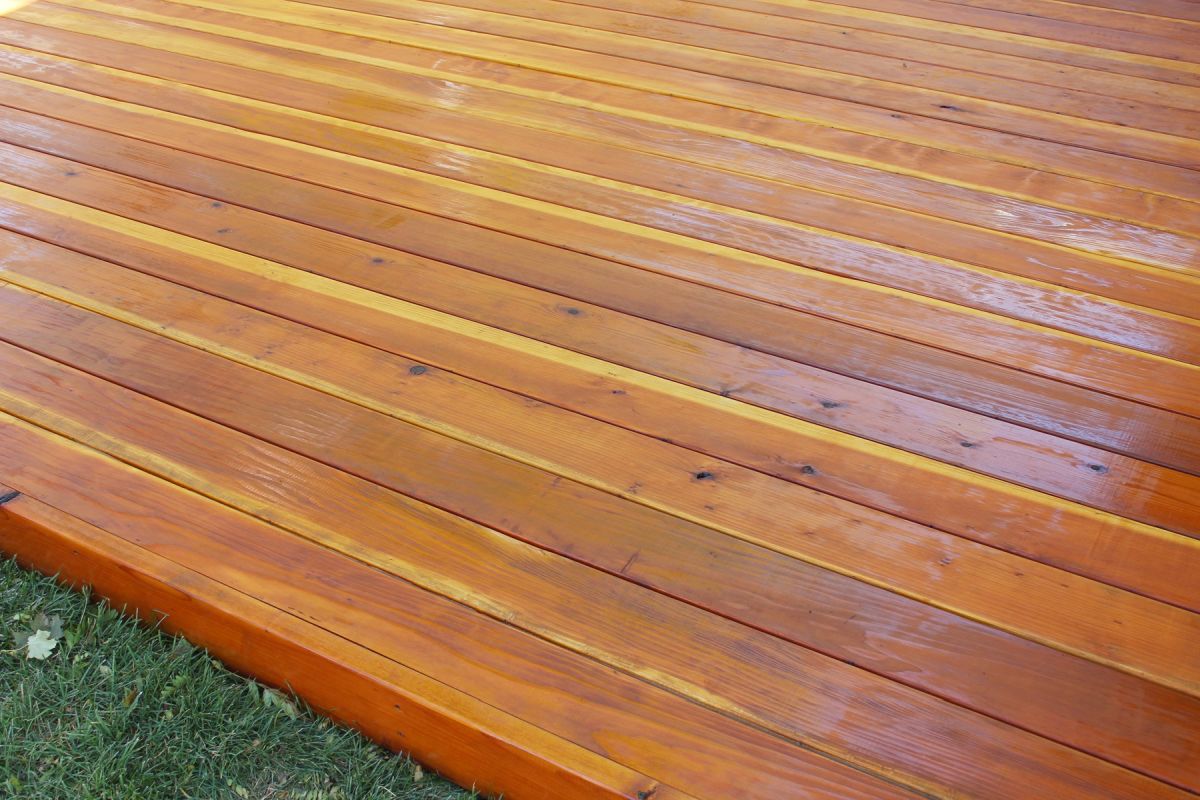
 This photo shows the wet stain on the deck floor. Before nosotros get right into information technology, you should know the following, if y'all're looking to stain and seal brand new wood on your deck.
There are two main schools of thought on the best way to stain a new deck. The kickoff is for the wood to sit, untreated, for 3-12 months to let the wood and its oils to fully settle and dry, then y'all sand and seal the wood at that signal for best absorption.
The 2nd, and the method this tutorial uses, is for the wood to dry out for at least a week after being installed, then it is sanded and sealed at this point. The reason this 2nd method was selected was due to the fact that, in the climate that this deck has been built, winters are difficult – very very cold, snowy, moisture, icy, and long.
Considering of this, we felt information technology would be best to protect the wood equally much as possible before a wintertime like that, so we opted to not look for months. Do your research, then decide which method is best for you. Regardless of your timing, the steps presented in this tutorial volition be nearly identical.
 View in gallery
 Step 1: Clean Your Deck
Begin by sweeping your deck floor thoroughly. If information technology is significantly dirty, wash it. Although, if you saturate the forest with washing it, you'll demand to expect several days/weeks (depending on humidity and temperatures) for the wood to dry out.
 View in gallery
 Step 2: Choosing Sandpaper
Take some 150- or 180-grit sandpaper. This is in betwixt medium and fine sandpaper (120- and 220-dust are more mutual for wood projects) and does a nice job of non just smoothing the wood but also opening upwards the wood'south "pores" and preparing it for absorbing stain.
 View in gallery
 Footstep Three: Wear Knee Pads
These are technically optional, but kneepads are highly recommended for this project, as you volition spend some quality time on your hands and knees. While these foam kneepads do the trick for a few minutes, they quickly become crunched down and provide lilliputian padding subsequently just a few minutes.
 View in gallery
 I would highly recommend spending the $vi more and getting kneepads with a hard crush. These are bachelor at your local hardware store. You lot'll be glad you did.
 View in gallery
 Step Four: Remove Whatever Rocks and Sticks
Use a screwdriver or another long, slim object to remove any pebbles or sticks that accept fallen between the cracks of your deck floor. You want the wood surface to be clean and clear for maximum stain absorption.
 View in gallery
 Step Five: Sanding Your Deck
Don your kneepads and work gloves (also optional only recommended), grab your sander, and begin sanding the deck floor thoroughly. Always sand with the grain.
 View in gallery
 Don't forget to sand the side finish pieces.
 View in gallery
 If you're using a palm sander, don't press down too hard. Let the sander practise the piece of work. It's your task to control its positioning and supplant the sandpaper often; it's the sander'south job to practice the heavy lifting, so to speak. You may utilize a little more force per unit area on splintery parts or down in the cracks, but effort non to sand away too much. Your goal is to open up the wood pores here and remove major splinter potential.
 View in gallery
 Sand non only forth the middle of your wood boards, but as well sand along the gaps, with half your sander on one board and the other half on the other. This volition help to ensure an fifty-fifty flatter and more even deck floor.
 View in gallery
 Work methodically, in sections about 5'-6' wide, always sanding with the grain. You lot tin can see here that it'due south relatively like shooting fish in a barrel to tell where you've sanded and where you lot haven't still. The sanded forest is much lighter than the wood that has been exposed to the elements, even if only for a week or ii.
 View in gallery
 Go on sanding until the unabridged deck is done, including the deck surface, the side trim, the railings (if applicable), and any other trim pieces you might accept. Anywhere that will be stained at this indicate needs to be sanded.
Step Six: Make clean the Surface
 View in gallery
 Utilize a leaf blower (or your broom, if you don't have a blower) to remove all the sawdust from your deck flooring. You're now ready to stain, as long as rain isn't in your forecast for at least 48 hours.
Step Seven: Choosing the Correct Deck Stain
 View in gallery
 The all-time forest deck stain for decks I have institute, and recommended highly by my local paint experts, is this Sikkens Proluxe matte stain. Information technology's a i-pace process that involves staining and sealing in i coat. It absorbs beautifully into the wood, and there are several stain tints you can choose. Natural (used in this example) is the lightest one with the least discoloration of the real wood. Although, as you'll shortly see, information technology still colors the wood but with a saturated, vibrant effect.
 View in gallery
 Footstep Seven: Applying Deck Stain
Yous'll also desire to apply the stain with a 4" brush. Natural fibers are e'er ideal for application, but the polyester bristles worked well with this stain. And they were much less expensive. They volition not terminal as long every bit a quality, natural-bristle paintbrush, though. So make up one's mind if that's an investment y'all'd like to make for your deck.
 View in gallery
 Stain only the length of 1 lath at a fourth dimension to avoid overlap. This product really is a one-coat awarding, then you don't want your castor to overlap the same betoken three or four times. The woods will have a hard time absorbing that much stain, and you volition probably be unhappy with the cease result.
 View in gallery
 Stain any trim pieces or railings in the same way – one coat, and doing ane board or piece at a time.
 View in gallery
 Be sure y'all are not staining yourself into a corner. In this example, we started at the outer edge so nosotros could finish the staining procedure at the deck steps toward the house.
 View in gallery
 Step Viii: Staining in the Cracks
Apply some stain onto the tip of your brush, and printing it into the cracks between boards to stain those also. Remember that stain is not simply for looks – it's a forest protector, and the sides of the boards need to be protected just like the acme does.
 View in gallery
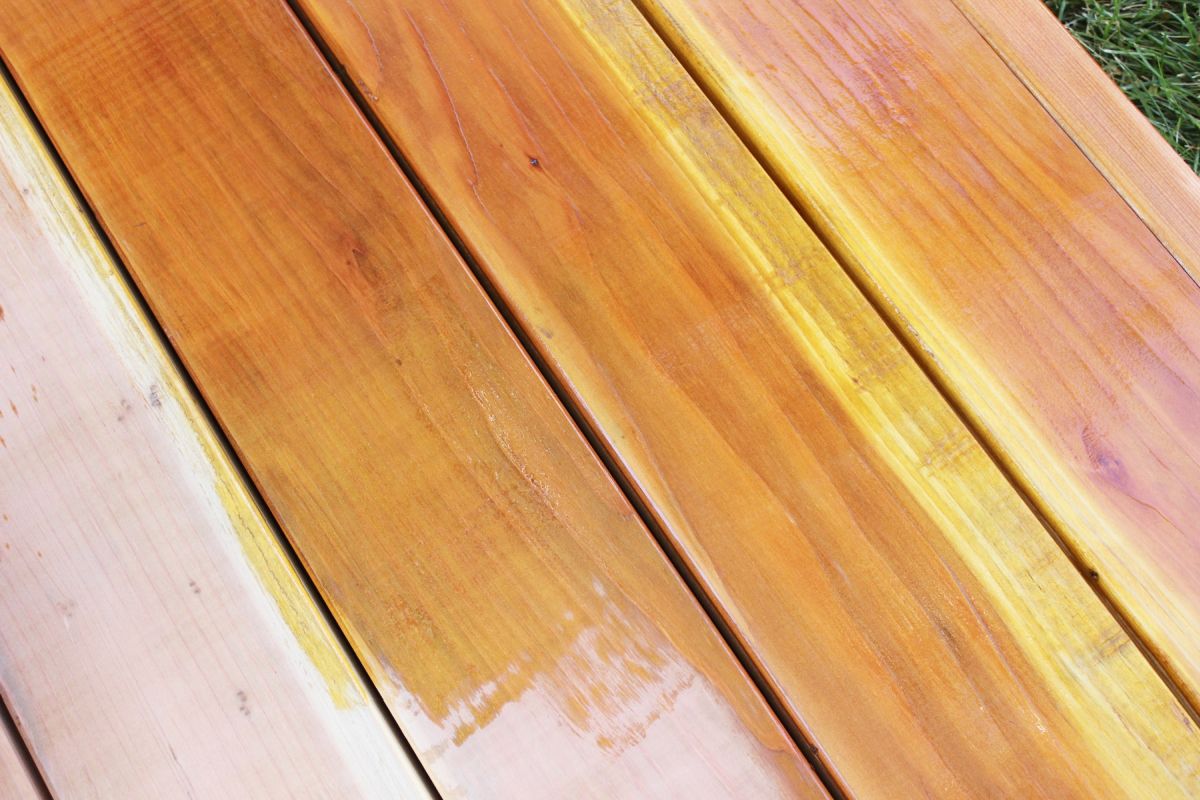
 You tin come across in this no-filter photo the departure between the original, unstained redwood and the redwood later this natural Sikkens stain awarding. It's much richer and darker.
 View in gallery
 Utilize the tip of the bristles along the gap betwixt your redwood boards and side trim piece, too. Anywhere the woods is exposed that you tin reach your bristles, that'south where yous'll desire to apply stain.
 View in gallery
 Allow the moisture stain to dry completely, at least 48 hours.
 View in gallery
 It is recommended that you stay off the freshly stained deck for at to the lowest degree 48 hours, and that y'all proceed whatsoever furniture off the deck for at to the lowest degree 72 hours.
 View in gallery
 The stain volition appear darker when it is wet; it volition lighten slightly as it dries.
 View in gallery
 I will admit here that I was a little disappointed at this point because, even though we chose the lightest stain, and even though the woods boards were becoming beautifully saturated, they were too more yellow than I wanted. I loved the grey-pinkish colour of our unstained redwood.
 View in gallery
 This is what the stain looked like directly after application. It's a little more orange than I had hoped.
 View in gallery
 But, good news if yous find yourself feeling the aforementioned way! This unfiltered photo shows what the stain turned into after drying for 48+ hours. It'due south not as brash, much subtler, and yet still vibrant and healthy-looking. My favorite aspect is the matte finish, as well – nil shiny about this wood flooring, which is a huge plus in my book.
 View in gallery
 To Sum Up
And then, that is how to properly and effectively and efficiently stain and seal your redwood (or whatsoever forest) deck. We promise you lot notice this tutorial helpful every bit you motion forrad in finishing up a cute piece of your property – a wood deck. Savor!
How to Stain a Deck
- Cull the type of stain you desire. Either Transparent, semi-transparent, or a solid colour stain.
- Choose your color. I highly recommend you go with something that matches your home's exterior.
- Clean existing deck. A pressure washer is all-time for this, especially if the deck has been sitting for a while. This removes any gunk and film on the surface to open up up the pores.
- Utilise deck stain in layers, letting each one dry out accordingly. Yous tin can utilize a sprayer, or do it by hand with a roller and brush.
- Allow dry earlier using.
FAQ
What temperature is also cold to stain a deck?
Annihilation less than 32 degrees Fahrenheit is likewise cold to stain a deck.
Can y'all stain a deck in the winter?
It's not recommended, simply I guess information technology depends on where y'all alive. If it's too cold or moisture, the stain will never dry properly.
Do I demand to sand my deck before staining?
Yes, if you want it to look its all-time. Sanding opens the pores and gives something for the stain to adhere to.
Source: https://www.homedit.com/how-to-stain-and-seal-redwood-deck/
Postar um comentário for "How to Stain and Seal a Redwood Deck So It Lasts Forever"